
Gallery walls offer a simple way to add character and warmth to any room. You gain control over the look by choosing what goes up and how pieces fit together.
This guide covers fourteen practical sections: common layouts, room-specific ideas, current styles, step-by-step setup, tools and materials, frame and art selection,
keeping the wall fresh, problem fixes, small-space solutions, adding depth and texture, lighting options, renter-friendly methods, mixing photos with prints, and final maintenance steps.
By the end, you will have clear, actionable information to create a gallery wall that suits your home and your life.
1. Common Gallery Wall Layouts

A good layout starts with the shape of your wall and the pieces you own. The right arrangement guides the eye naturally and makes the display feel complete.
Different layouts suit different needs. Asymmetrical ones add interest through variety, while grids bring order.
Cascades work well on sloped or long walls. Test your choice on the floor first to see what flows best. Pay attention to the overall shape the frames create together.
A loose oval or gentle curve often feels more natural than a perfect rectangle.
- Choose a focal point piece to anchor the arrangement.
- Keep spacing consistent at 1.5 to 3 inches between frames.
- Balance large and small items so nothing overpowers the rest.
- Use a level to keep lines straight.
- Center the whole display at eye level, about 57 inches from the floor.
A balanced layout makes the wall look intentional.
2. Gallery Wall Ideas by Room

Match the display to the room’s daily use. This keeps the overall home feeling connected.
Living rooms benefit from larger, bolder setups above sofas. Hallways and entryways work with slim, vertical lines. Bedrooms need quieter arrangements that support rest.
Kitchens can handle small, food-themed clusters near dining areas. Bathrooms suit moisture-resistant frames with simple prints.
Each room has its own rhythm, so consider traffic flow and viewing distance when planning.
- Place living room walls at sofa height for easy viewing.
- Use narrow frames in hallways to save space.
- Choose softer tones in bedrooms for a peaceful effect.
- Group family photos in entryways for a warm welcome.
- Keep bedroom displays smaller to avoid visual noise.
The right room placement makes the wall part of everyday life.
3. Popular Styles in 2026

Styles today mix personal items with art for a collected look. Trends lean toward variety over strict matching.
Eclectic walls layer different materials and themes. Monochrome keeps things simple with one color family. Both approaches let you start small and build gradually.
Many people now include travel souvenirs, children’s drawings, or pressed flowers alongside traditional prints. The goal is a display that feels lived-in rather than perfectly staged.
- Mix wood, metal, and linen frames for texture.
- Stick to black-and-white for a clean, timeless feel.
- Include small plants or objects in eclectic setups.
- Use one main color thread to tie pieces together.
- Add variety in frame shapes without clashing.
Your style choice shows what matters to you.
4. Step-by-Step: How to Set Up Your Gallery Wall

Planning prevents mistakes. Follow these steps for a solid result without extra holes in the wall.
Start by gathering pieces and testing layouts. Use paper templates to preview the arrangement on the wall. Hang from the center outward once everything looks right.
Work in daylight if possible so shadows do not trick your eye. Take breaks to step back and view from across the room. Small shifts often make the biggest difference.
- Gather frames, photos, and art with a shared theme.
- Lay items on the floor and rearrange until satisfied.
- Trace frames on paper, cut out, and tape to wall.
- Mark nail points with pencil and use a level.
- Hang center piece first, then fill around it.
Paper templates make the process easier and faster.
5. Tools and Materials You Will Need
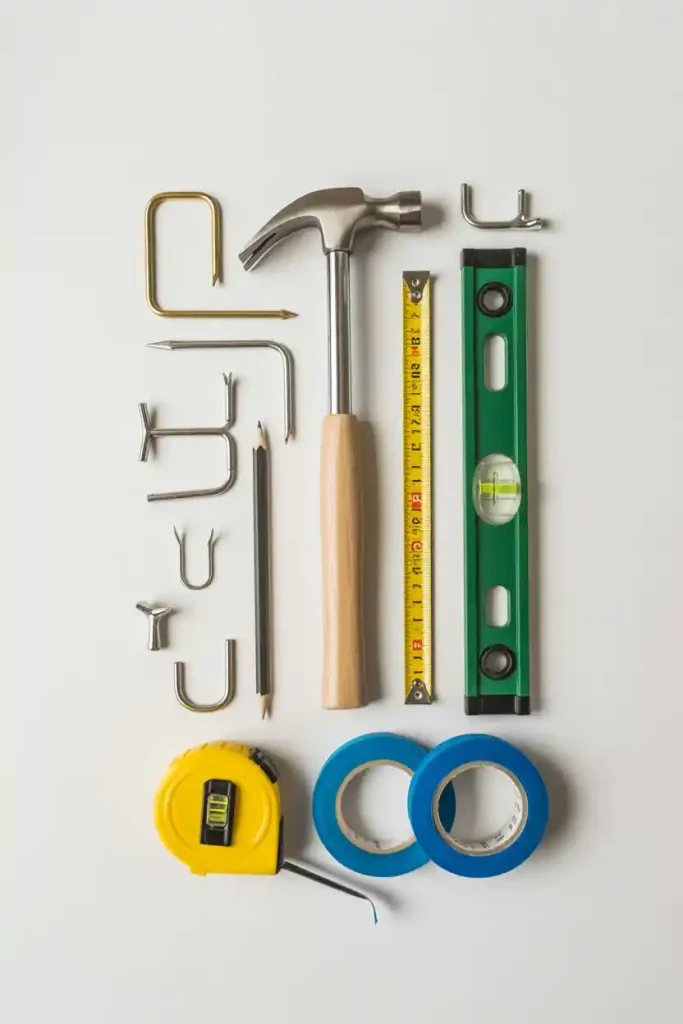
Having the right tools ready saves time and reduces frustration. Most items are already in a basic toolbox or easy to borrow.
Simple preparation makes hanging much smoother. Gather everything before you start so you avoid stopping midway. A sturdy step stool helps reach higher spots safely.
Good lighting during installation prevents crooked placement. Keep a small container nearby for screws and nails.
- Hammer and picture nails or hooks
- Measuring tape
- Pencil
- Level (small bubble level works best)
- Painter’s tape for testing
- Removable hooks (for renters)
- Step stool
Good tools lead to cleaner results.
6. Tips for Choosing Frames and Art

Frame choice affects the entire look. Pick frames that work together without being identical.
Consider size, color, and material when selecting. Start with pieces you already own, then add as needed. Look for frames that complement the wall color rather than fight it.
Matte finishes reduce glare in bright rooms. Glass protects photos from dust but can reflect light.
- Select frames in 2–3 matching finishes (wood, black, gold)
- Mix thin and slightly thicker frames for interest
- Choose mats for smaller photos to give them presence
- Include at least one larger piece for balance
- Look for lightweight frames that are easy to hang
- Avoid very shiny frames in sunny rooms
Thoughtful frame selection ties the wall together.
7. How to Keep Your Gallery Wall Fresh

Walls can stay interesting over time with small updates. Refreshing keeps the display personal as your life changes.
Rotate pieces or swap out a few items every few months. This prevents the wall from feeling static. Store unused pieces carefully so they stay flat.
Label backs of frames to remember where they came from. Keep a small notebook or phone folder with current layout photos for reference.
- Replace seasonal photos (holidays, vacations)
- Add new artwork you find over time
- Move smaller pieces to different spots
- Clean frames and glass regularly
- Take a photo of your current layout before changes
Small updates keep the wall meaningful.
8. Common Problems and Quick Fixes

Most gallery wall issues are easy to correct. Spotting them early saves rework.
Common mistakes happen to everyone. Simple adjustments can fix the look without starting over. Uneven spacing is the most frequent complaint.
Crooked lines usually come from skipping the level. Too many similar sizes can make the wall feel flat.
- Frames look crooked → recheck with level
- Wall feels too crowded → remove 1–2 pieces
- Spacing feels uneven → measure and adjust gaps
- Display sits too high → lower to eye level
- Colors clash → swap one item for better match
- One piece keeps falling → use stronger hook
Quick fixes improve the result fast.
Gallery Wall Ideas for Small Spaces

Small walls or apartments need smart planning. You can still create impact in limited areas.
Focus on vertical space and fewer, carefully chosen pieces. Scale down without losing personality. Narrow walls benefit from tall, slim arrangements.
Corners can hold small clusters. Above doorways offers unexpected but effective space. The key is quality over quantity.
- Use one tall vertical column of frames
- Choose small or mini frames
- Place above doorways or in corners
- Stick to 4–7 pieces maximum
- Opt for slim frames to save visual space
- Keep color palette very tight
Small spaces can have strong gallery walls.
10. Adding Depth and Texture

Flat walls gain interest with different textures. This makes the display feel richer.
Layer materials and surfaces thoughtfully. Small additions create a more complete look. Canvas prints add softness. Metal frames bring a modern edge.
Wood tones warm up cool rooms. Even the mat material changes the feel. Mix finishes carefully to avoid visual chaos.
- Mix glossy and matte frame finishes
- Include canvas prints or fabric art
- Add small shelves for 3D objects
- Use linen or textured mats
- Place one framed mirror for light bounce
- Layer overlapping frames slightly
Texture brings the wall to life.
11. Lighting Your Gallery Wall

Good lighting shows off the details. It also makes the wall visible at night.
Simple lighting upgrades the entire display. Natural light works during the day; added light helps after dark. Battery-powered options are easy to install.
Position lights so they do not create harsh shadows. Warm bulbs feel more inviting than cool white ones.
- Position near a window if possible
- Use battery-powered picture lights
- Install slim LED strips above the top frame
- Choose warm bulbs for cozy feel
- Avoid harsh overhead glare
- Angle lights slightly downward
Proper lighting highlights your favorite pieces.
12. Gallery Walls for Renters

Renters can enjoy gallery walls without permanent damage. Removable options make it safe.
Many solutions work well and come off cleanly. Plan ahead to protect walls. Test every adhesive in an inconspicuous spot first.
Choose frames that stay under the weight limit of the hooks. Keep arrangements lightweight overall. Document your setup with photos before removal.
- Use strong removable adhesive hooks
- Choose lightweight frames under 5 pounds
- Test adhesives on a small area first
- Keep nails out of the plan
- Take photos before removal for reference
- Remove slowly at a low angle
Renters can create beautiful walls too.
13. Mixing Photos and Art Prints

Combining personal photos with art creates balance. It keeps the wall interesting.
Mixing types adds variety. Follow a few simple rules for harmony. Use similar frame styles across both. Match color tones rather than exact subjects.
Place art prints as larger anchors. Cluster personal photos in smaller groups. This balance tells a story that feels complete.
- Use similar color tones across photos and prints
- Frame both in matching styles
- Place art prints as anchors
- Keep photo sizes varied
- Group similar themes in clusters
- Limit very bright colors to one or two pieces
This combination tells your story clearly.
Final Touches and Maintenance

Once the wall is up, small details finish the job. Regular care keeps it looking good.
Step back and check from different angles. A few adjustments often make a big difference. Walk through the room at different times of day to see how light changes the appearance.
Clean gently to avoid damaging frames. Tighten hardware periodically. Enjoy the process of living with and slowly evolving your wall.
- Clean glass monthly with microfiber cloth
- Tighten hanging hardware every few months
- Dust frames gently
- Realign pieces if they shift
- Update one piece every season
- Photograph the finished wall for memories
Final care keeps your gallery wall fresh and sharp.